Tag Archives: Susan

Costumes – Completed

9 Nov

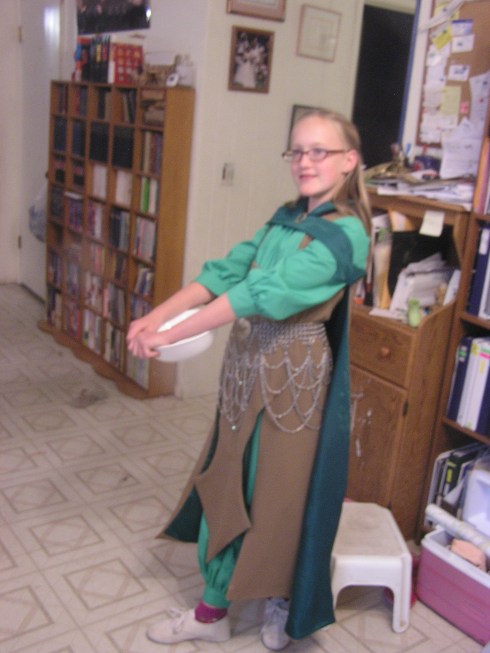
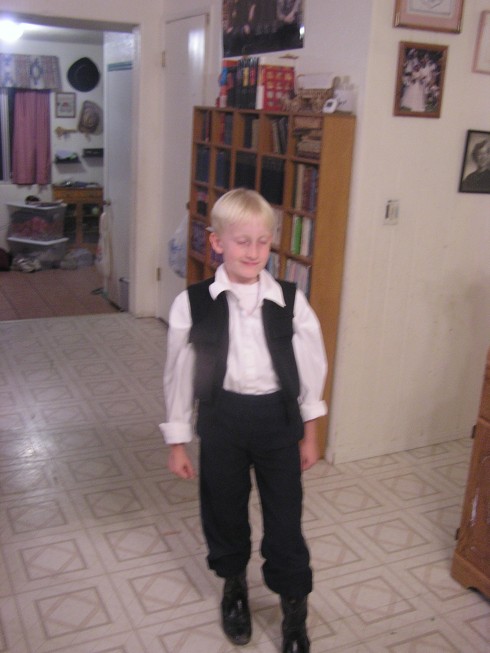
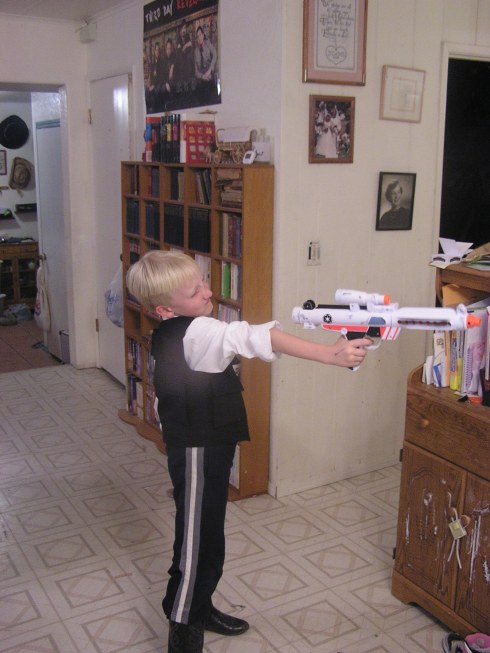
Halloween has come and gone.  All the candy, the excitement, and the costumes 😛 .  If you recall (and even if you don’t), I was making some costumes for my younger siblings: Han Solo, Luke Farm boy, and a Mirkwood Elf.  After a good deal of work and pain, I actually got them completed, along with a set of Jedi robes for myself.  Since I last posted about costumes, I also completed a classic Leia gown.

So, pictures 🙂 .

Recreating the original artwork pose

My farmboy

Ain't he handsome??

You don't mess with the Han 😉

My Nabooian Jedi, stage 1

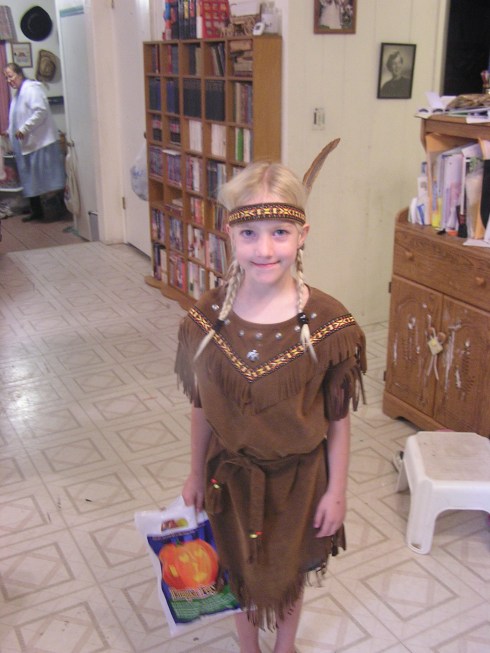
And the other kids had costumes too, but I didn’t make them.

The Indian maid. Mom made this costume.

Lady Luck in all her glory. She made her costume, with some help from Mom.

The dreaded Alley Cat

And someone will think I’m crazy, but there is this musical called “Romeo et Juliette: De Haine de A’lmour” which is about Romeo et Juliette and one of the dancers/background singers has this totally cool costume that I’m going to make some time 🙂 .

This is a costume from a musical that I can't wait to make.

So yep.  And I’ve been slowly work on a Susan dress for a girl, and I really need to finish it.  Right now I’m stalling cutting out the lining and modesty top for it.  I need to just do it 😛 .

Susan’s Archery Dress – The fabric!

23 Sep

I have it!  I have the fabric for Susan’s Archery dress!

Okay, I’ll explain 🙂 .  Shalayne, the second girl I’m making this dress for, is ready for me to move on to the offical dress, so I ordered the fabric online.  Unfortunatly, the first fabric we wanted wasn’t sold online, and at that point, I had to purchase online.  Then the second fabric wasn’t in stock so we finally settled on an Army Green Cotton Twill from Joann’s.  I ordered online and had some worries that I wouldn’t get enough fabric, as they didn’t have full 8 yds I ordered, and the packing slip thing I got in my email said I was only getting 6 yds.  But when I called, they explained that they didn’t have the full 8, so were sending me a little over 7 yds, but only charging me for 6.  This, of course, is wonderful for me to hear, so I decided to just wait and see if I would have enough with what came and if I didn’t enough, I could order another couple of yards to finish it.

Well, the box came today and I’m so happy with it!  There is more then enough yardage, even though it came in two pieces.  The big piece is perfect for the side pieces and back (which have all the fullness) and the shorter piece is perfect for the front and sleeves 🙂 .  And the color!!!!  It’s perfect!  It has the weave, like Susan’s dress did and looks to be a very comparable to the fabric.  It might be a little bit light and might not have enough green in it. But I think it will work perfectly and I’m even considering getting some of this fabric for my own Susan dress 🙂 .

The fabric! It looks better in person.

Right now the fabric is hanging out on the line and as soon as I get the muslin back from Shalayne, I will cut it out 🙂 .  Oh, this is exciting 🙂 .

Susan’s Green Archery Dress – Sewing the Muslin

3 Aug

Since I worked so hard yesterday drafting the pattern and cutting out the pieces, I decided to sew the muslin up today.  It was alot of fun and went together really easily (though I found one spot in my drafted pattern that I need to change).  I had a piece of paper for taking notes on and AMAZINGLY I only took 3 notes the whole day!  That’s amazing and great!

Now, how I did it 🙂 .  I really wanted something like this as I was making the dress, so I hope someone else can use this one day 🙂 .

1. All the pieces are cut out, so first I sewed the front piece with the front side piece (the one I drafted).

These pieces went together PERFECTLY, I’m so pleased.

2.  Now attach the direct side piece.

This direct side piece is actually shorter then my drafted side front piece, so I need to shorten the side front piece to line up.  But that shouldn’t be too hard 🙂 .

3. Now it’s time for the back of the dress.  First I sewed up the back seam as far as the opening, then I attached all the little loops for threading the lace through and attached the panel that goes in the back.  I spaced the loops 2″ apart all the way down the back.  From the pictures of Susan in her dress, it looks like she laces her dress down the back, with the laces in a little bow at the bottom.

Right now the panel is only connected on one side.  My mom has suggested that I attach the panel to both sides, making the panel big enough that the hips/bust can slide through.  It’s an option and I might try it 🙂 .

4.  Attach the side back to the back.  This is very simple and went just perfectly 🙂 .

5. Sew the shoulders and side seams!  Now you should have a dress that looks almost like what you want.  I wouldn’t recommend fitting much here, because you need the sleeves to get a real good fit and make everything work right.  But it is great fun to put it on and swirl the skirt 🙂 .

6. Face the neck and back.  The dress calls for a facing around the neck to achieve that smooth, finished look and to get the v without trouble.   I also decided to face the back down the left side of the loops, so that they would stay in their place and not jump around the back of the dress.

I forgot about cutting facings and such, so they ended up being cut strange and all, but it works for a muslin 🙂 .

6.  Now you get to do the sleeves!  With Susan’s sleeves, they have this point at the knuckle under the pinkie, so the first thing to do is line the sleeve points.  I made my lining kinda short and after trying to put the outfit on, I think it would be wisest to bag or fully line the sleeve.  Oh, and before you line the sleeve, you have to make the slashes in the sleeve.  I didn’t do that on this muslin, but I’ll probably do it on the next one, just for the practice, because I want to know what i’m doing before I work with the expensive fabric 🙂 .

8. NOW you get to sew the sleeve all the way up 🙂 .  I sewed the sleeve and the lining side seams at the same time, creating a bag lining, though the lining is a little short as I mentioned earlier.   But it looks really good, REALLY GOOD.

Doesn’t that sleeve look so cool!

9. Now sew the sleeve to the dress.  I had cut my sleeve too big, so I had trouble making it fit smoothly into the arm hole.  Depending on how the dress fits, I might make the sleeve smaller or make the arm hole bigger.  One of those two 🙂

10. Finally sew the gussets in the arms.  This is unique to McCalls 4490 and it was tricky!  I decided I don’t really like gussets 😛 .  But I got them in and that was the last step for this dress!

My sister posing with the completed muslin on

Now the muslin is ready to send off to Jenni so she can try it on and make it fit!

Susan’s Green Archery Dress – Drafting and Cutting

2 Aug

I did it! I got the dress pieces drafted to the place where I LOVE them and then I got the dress muslin cut out (except for the sleeves, my laptop died before I could draft the sleeves). I’m very happy with how the pattern pieces turned out, espeically the side front piece (that strange one that adds fit and fullness). I think my piece turned out almost exactly like the original. I’m not totally sure, though. I have to sew up the muslin to see how it turns out 🙂 .

Unfortunately, I don’t have any pictures 😦 . I forgot the camera when I was cutting and drafting and then my laptop’s webcam (which I had planned to use) was not availible to me. So you will pictures of the pieces and such later 🙂 .

Susan’s Green Archery Dress – Pattern Drafting

2 Aug

Since Susan’s dress isn’t one that you can just buy a pattern for and I want this dress to fit Jenni properly, I’m going to redraft the pattern to be what I want. I need to cut down the pattern I have and cut a new side front piece and make sure the sleeve will actually fit. That’s what I’m going to do today. I’ll post pictures later!

Susan’s Archery Gown – Research and Shopping

31 Jul

I have been comissioned/asked by my friend Jenni to make her a dress that looks like Susan’s Archery Gown from LWW.  In return, she is crocheting me a fancy sweater, which I think is just way cool 🙂 .  And Jenni has given me permission to blog about the process of making the dress!

The first step for me was to find out what I could about the dress.  A very helpful resource was Narnia Web’s Wardrobe section on the dress.  The pictures they have collected are marvlous and their notes are very helpful.  From there, I started looking at what others had done in the making of their dresses.  I got several things from this, 1 being that there are three front panels in the dress.  In a regular Princess Seam dress there are two panels in the front, the Front panel and the Side front panel.  In Susan’s dress, there are three panels, a Front panel (which is fairly straight flarewise), and extremely full Middle panel (the new panel), and a traditional side front panel.  The back is fairly simple, with the traditional two panels, though the back opening is very interesting.  It closes up with lacing up the back, with a placket under the lacing for modesty.  My trick for the back will be to make the placket big enough to allow for needed lacing.  The front of the dress is going to be tricky because there isn’t a pattern with three sections for the front of a princess seam dress.  All the patterns just have two sections.  So I’m going to have to draft the third section and make sure that it fits in with the rest of the dress pieces without making the dress too big.

Here are some pictures I’ve looked carefully at from Narnia Web.

A beautiful full length shot

A good side view of the dress

I just love the swirl of the skirt

These are just some of the pictures I’ve been examining in search for info on the dress 🙂 .  I showed these and other pictures to my mother and we had a discussion on if there was a side seam . . . We finally decided that there was a side seam (whew), which is good, because then the skirt can be fuller 🙂 .

And then today my dad had to go to town to go the bank and he agreed to stand around in Joann’s while I looked at fabric (and stood in line way too long to get it cut 🙂 ).  I found three possible fabrics that are the right colors and one fabric in particular that I think will be perfect.  It’s a deep green of the pictures, maybe even darker, but I’m thinking it will be perfect 🙂 .

The color of the dress

And the best part is that this fabric is on sale at Joann’s!  Half off!  So instead of $60, I’ll only have to spend $30 on the fabric!  And I think the rest of the stuff I have (but who knows 🙂 ).  I’m getting really excited about this dress.